How to Iron a Dress Shirt Without Missing a Wrinkle
To learn how to iron a dress shirt, press the collar and cuffs first, then the sleeves, front panels, and back. Follow the care label, smooth each section, and use steam only if the fabric allows it.
On this page (8 sections)
- What do you need to iron a dress shirt?
- How do you iron a dress shirt in the right order?
- How do you iron the front and back panels?
- How do you avoid shine, scorch marks, and water spots?
- Which steam iron suits your shirt ironing routine?
- What are the common mistakes when ironing a dress shirt?
- How do you finish and hang the shirt?
- How should you choose the best way to iron a dress shirt?
To learn how to iron a dress shirt, press the collar and cuffs first, then the sleeves, front panels, and back. Follow the care label, smooth each section before pressing, and add steam only if the fabric allows it.
A shirt that's slightly damp is usually easier to press than one that's dry and deeply creased. If it's already dry, use the iron's steam setting when permitted, or lightly mist the fabric and give the moisture a moment to spread.
What do you need to iron a dress shirt?
You need a clean iron, a stable ironing board, and a readable care label. A spray bottle or the iron's steam function can help with stubborn wrinkles, but check first that the shirt can take moisture.
Set the board at a height where you can guide the iron without leaning over it. Clear the surface, check that the soleplate is clean, and place the shirt where you can move it without pulling the fabric across the floor.
Choose an iron with controls that make sense for the fabrics in your closet. If shirts are mostly cotton and you want steam controls for stubborn creases, the CHI's temperature dial, adjustable steam, and steam burst are useful features.
If you prefer a retractable cord for storage, the Rowenta has one and more than 350 steam holes. The T-Fal has a precision tip and anti-drip feature for detail work around plackets and pockets.
For shirts with mixed fibers, use the care label's most delicate setting as your starting point. This guide to iron temperatures for polyester, cotton, and silk can help you choose a cautious setting.
How do you iron a dress shirt in the right order?
Iron a dress shirt in this order: collar, cuffs, sleeves, front panels, and back. Working from small, structured areas to larger ones makes it easier to keep finished fabric smooth.
Button the collar or cuffs only if it helps hold the shirt flat. Don't press directly over buttons.
Guide the iron tip around them instead.
How do you iron a dress shirt collar?
Lay the collar flat and press from each point toward the center. Turn it over and repeat on the other side.
Use short, steady strokes rather than dragging the iron back and forth. That keeps the fabric aligned and reduces the chance of adding a crease.
How do you iron cuffs without adding folds?
Open each cuff and lay it flat, then press both sides. Work around the buttons and smooth the fabric toward the cuff edge before pressing.
Flatten the cuff placket with your hand so it doesn't trap a small wrinkle. If the cuff has several layers, use light pressure and let the iron's heat and steam do the work.
How do you press sleeves without a sharp crease?
Lay one sleeve flat with its seam along one edge, then smooth the top layer with your hand. Press from the shoulder toward the cuff without forcing a fold into the top of the sleeve.
Turn the sleeve over and repeat. If an unwanted crease forms, reposition the fabric and use steam only if the care label permits it.
How do you iron the front and back panels?
Press the front panels and back in sections, keeping the shirt smooth and flat on the board. Move around buttons, pockets, and seams instead of pressing directly over raised details.
Start with the button side. Use the iron tip between the buttons and along the placket, then press the rest of the panel in overlapping passes.
For the other front panel, work around pocket edges. Lift the iron at seams rather than forcing it over thick layers, which can leave an imprint on the fabric.
Lay the back across the board and press from the shoulders down. Shift the shirt as needed so each section lies flat without bunching.
If the sleeves are getting in your way, fold them loosely over the shoulders while you work on the back.
For a steady routine with steam, read how to use a steam iron. A smooth glide and even contact are more useful than pressing hard.
How do you avoid shine, scorch marks, and water spots?
To avoid shine or scorch marks, use the care label's heat setting and keep the iron moving. On dark or delicate fabric, press inside out or place a clean pressing cloth between the iron and shirt if the label allows it.
Don't leave a hot iron standing on the fabric, even for a short pause. Lift it between sections, and stop if the color or texture changes.
Water spots can appear when a fabric doesn't tolerate moisture well. Check the label before using steam or spray, and try a hidden area if you're unsure how the shirt will respond.
If the iron spits or leaks, stop and check its water level and instructions before continuing. See why an iron leaks water for common causes.
Which steam iron suits your shirt ironing routine?
The right steam iron depends on how much control, storage convenience, and detail work you need. These options suit different routines, so choose by the feature you'll use most often.
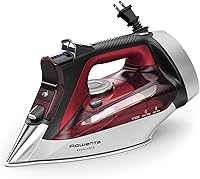
The Rowenta AccessSteam Steam Iron has a stainless steel soleplate, over 350 steam holes, and a retractable cord. Its fabric settings cover cotton, wool, polyester, silk, linen, and nylon, and it has an automatic shutoff feature.
This is a good fit if you iron shirts often and want the cord to store neatly. Skip it if you want a temperature dial with adjustable steam controls, or if you don't need steam and prefer a dry iron.
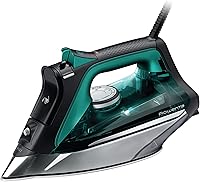
The CHI 1700W Steam Iron has a temperature dial, adjustable steam, and a burst of steam for stubborn wrinkles. It supports horizontal steam ironing and offers a vertical steam burst for hanging garments.
Choose it if you want to adjust heat and steam for different shirt fabrics. Skip it if a retractable cord is your main priority, since the product details don't describe the cord as retractable.
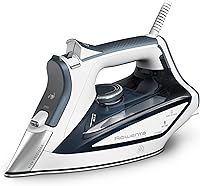
The T-Fal Ultraglide Steam Iron has a precision tip, anti-drip feature, and vertical steam setting. It works with cotton, wool, polyester, rayon, and silk, and offers continuous steam plus a stronger steam boost for difficult creases.
Choose it if you want a pointed tip for narrow areas and a steam boost. Skip it if you need a fabric setting for linen or nylon, since those fabrics aren't named among its supported materials.
For a wider choice of irons, see the best irons for clothes at home. If a shirt is clean but wrinkled and you don't want to press it, how to remove wrinkles from clothes fast covers other approaches.
What are the common mistakes when ironing a dress shirt?
The most common mistakes are using too much heat, pressing over buttons, and ironing fabric that isn't smooth. Take a few seconds to check each section before the soleplate touches it.
Don't start with a high setting because the shirt looks heavily wrinkled. Heat that is too high can damage delicate fibers, while a lower setting may need more time and a little steam.
Follow the label and increase the setting only when it allows.
Don't iron a sleeve while its layers are twisted or bunched. Smooth the fabric and line up the seam first, or you'll press the wrinkles into place.
Avoid repeated passes over the same spot without checking the result. Let the fabric relax, then make another pass only where a wrinkle remains.
How do you finish and hang the shirt?
After pressing, hang the shirt on a hanger and fasten the top button while the fabric cools. This helps the collar hold its shape and keeps the shirt from picking up new wrinkles on a flat surface.
Check the collar points, cuffs, placket, and underarm seams for missed wrinkles. Touch up only the areas that need it rather than pressing the whole shirt again.
If you don't have a board, how to iron without an ironing board explains safer alternatives. For matching dress pants, follow how to iron pants with a sharp crease.
How should you choose the best way to iron a dress shirt?
For a reliable finish, follow the care label, press in a set order, and smooth each section before the iron touches it. Use low heat for delicate blends and steam only when the fabric permits it.
Choose the Rowenta if a retractable cord and broad steam diffusion matter most. Pick the CHI if you want a temperature dial and adjustable steam, or the T-Fal if its precision tip and anti-drip feature fit your detail work.
Hang the shirt as soon as you're done. For another piece of your outfit, use the same care-label-first approach in this guide to ironing pants with a sharp crease.
Frequently asked questions
Should you iron a dress shirt inside out?
You can iron a dress shirt inside out to reduce the chance of shine, especially on dark fabric or areas with embroidery. For a crisp finish, turn it right side out for the collar, cuffs, and front placket, using a pressing cloth if the care label allows.
What order should you iron a dress shirt in?
Iron a dress shirt in this order: collar, cuffs, sleeves, front panels, and back. This sequence handles small, structured areas before the larger panels and helps you avoid wrinkling sections you've already pressed.
Should a dress shirt be damp before ironing?
A slightly damp shirt is easier to press than one that's fully dry and creased. If the shirt is dry, use the iron's steam setting if the care label permits it, or lightly mist the fabric and wait a moment for moisture to spread.
How do you iron a shirt without making a crease in the sleeve?
Lay the sleeve flat with its seam along one edge, smooth out the fabric, and press without pushing a sharp fold into the top. If you want a crease, align the sleeve carefully first; otherwise, keep the fabric relaxed as you work.